Have you ever tried to explain a problem you’re having with your phone to someone over the phone?
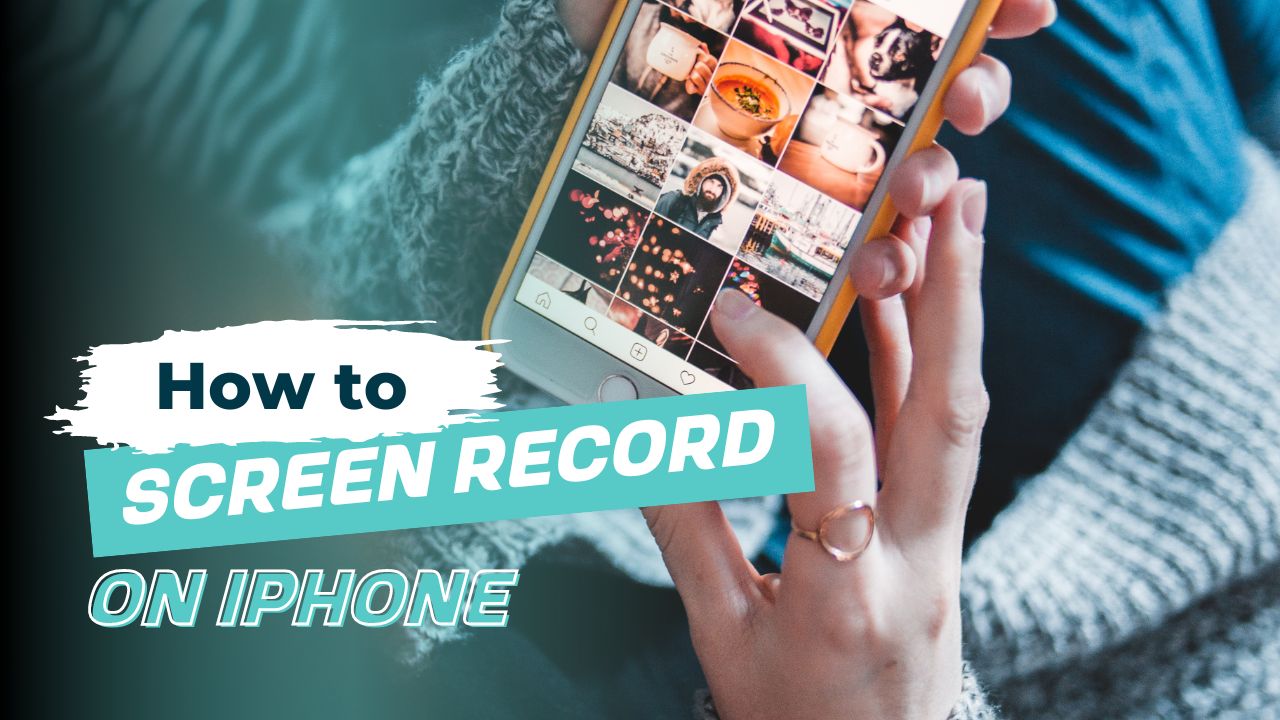
Let’s just say it can be frustrating for all involved, which is why we are going to show you how to screen record on your iPhone. After watching our video and using our written tutorial you will know how to share exactly what you are seeing on your phone’s screen with the person on the other end of the line.
Being able to record my iPhone screen allowed me to help my dad with his phone even though he lived 9 hours away, and let me tell ya’ll it was a blessing to both of us. Prior to being able to record our screens, my father, who had macular degeneration would try his best to explain what he was seeing on his phone but would often get very frustrated for obvious reasons. But that was no longer the case after we began screen recording. 🙂
Apple introduced the ability to screen record on iOS 11, so if you have iOS 11 or higher your phone should be capable of recording your screen. So the next time you’re having a hard time figuring something out on your iPhone and need help just record your screen and send the recording to someone who can help.
Let’s get this party started and learn how to record your iPhone’s screen.
Watch the Video Tutorial (We recommend using the written tutorial below as you watch the video)…
Written Tutorial: How to Screen Record on iPhone

Add Screen Recording to Control Center
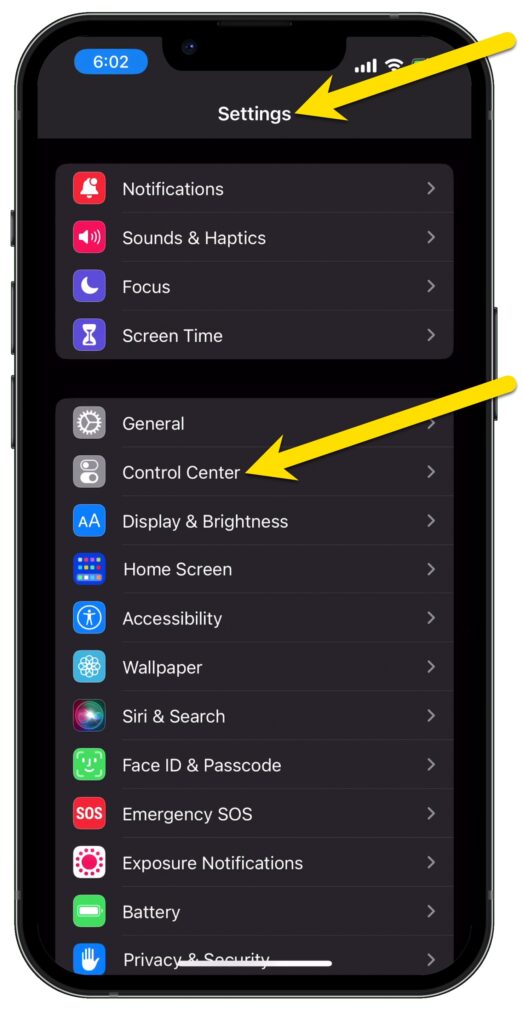
- Go to your phones Settings

- Swipe up on the screen until you see Control Center and tap on the icon
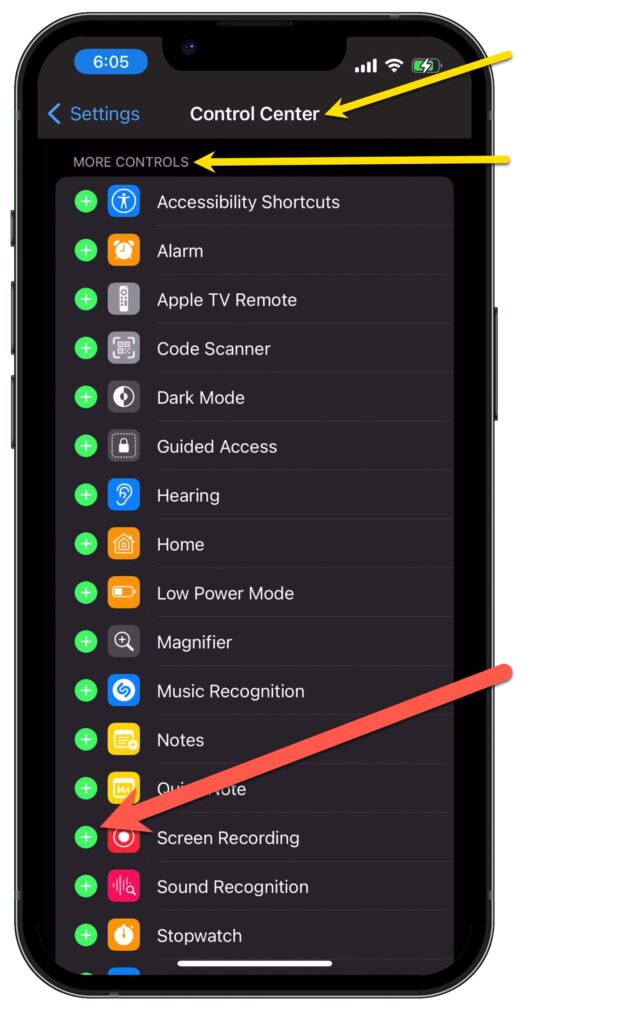
- Swipe up on the screen until you see More Controls.
- Under More Controls, keep swiping up until you see the Screen Recording icon
 .
. - Tap on the green plus sign to the left of it.
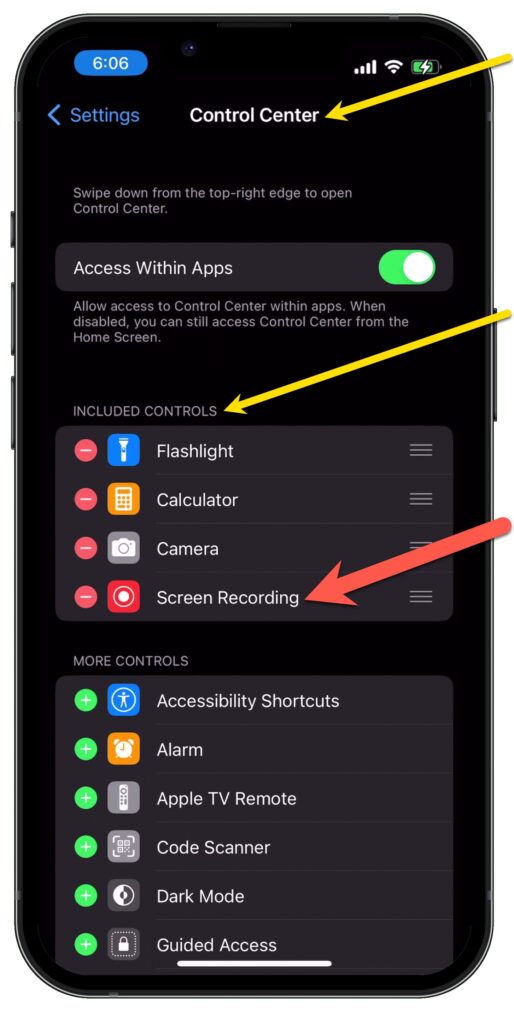
- Swipe down on your screen and you’ll notice that Screen Recording jumped up on your screen under Included Controls.

Begin Recording
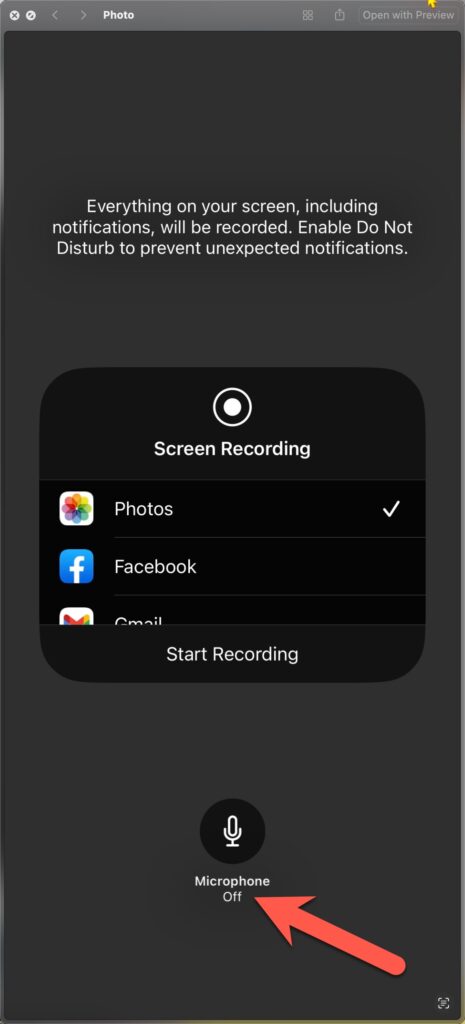
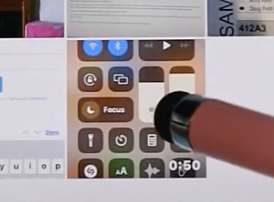
- To navigate to the recording icon, put your finger on the screen at the top right of the phone and swipe down and to the center of the screen until the additional options are displayed.
- Locate the recording icon
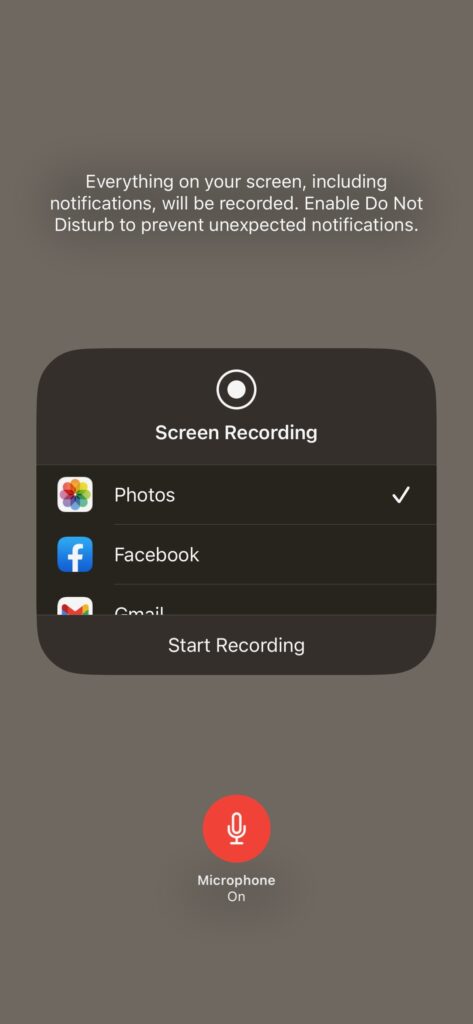
- If you want to record your voice you will need to turn the microphone on prior to recording. To do this, press and hold your finger down on the recording icon, tap on the microphone image ( (it will turn to red signifying that the microphone is now on).
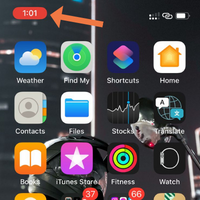
- Tap on the Start Recording button and wait for the 3…2…1 countdown. Then go to wherever it is on your iPhone that you want to record.


Stop Recording
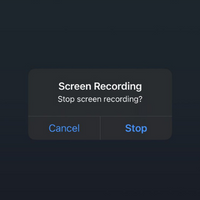
- To finish recording simply tap on the red icon with numbers at the top left of your screen. Tap on Stop and you’ll get the message that your screen recording video is saved to your photos.

Find Recording in Your Photos
- Head over to your photo app and you’ll see the video recording there.
I hope this tutorial helps you understand how to record on iPhone and will make helping seniors that are not close to you a little easier.
Do you love this post? Share the love and PIN IT!